
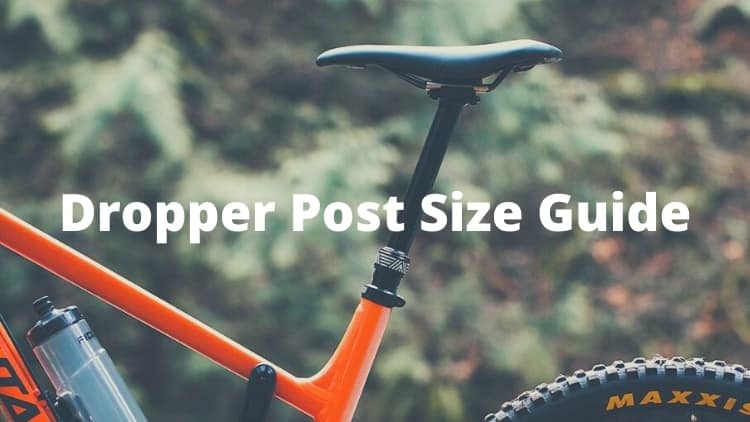
Dropper seat posts, also known simply as dropper posts, are perhaps the best upgrade you can add to any mountain bike. It’s such a great upgrade, as it enables a rider to rapidly and effectively drop the seat height when riding along. Whether you’re looking to buy your new seatpost or just in the market for some research, here is a size guide for dropper seatposts.
Overview
Before we start, we like to add a little overview to our dropper post-size guide.
- Cable routing
Just like your brakes and derailleurs, Dropper seat posts utilize cables to link the remote or lever on your handlebars to the seat post itself. There are 2 separate ways that these cables route from the bars to the post – Inward (within the bike’s edge) or outside. A few bikes are equipped for inside, or “stealth” routing, which aids in reducing clutter on the bike – plus, it decreases the odds of anything getting torn. In contrast, outwardly routed dropper posts are more simple in arrangement & service.
Note: You can’t run an inward (for example “stealth”) routing dropper post along with a bike frame that isn’t explicitly prepared for inward cable routing.
- Stack height
Stack Height refers to the distance between the bottom of the seatpost collar and the middle of the saddle rails clamp. This measurement can also be found by measuring the “general length” — the highest insertion length.
Compatible Height – this is the equivalent of the stack height + any uncovered seat post between the frame’s seatpost collar and the dropper seal collar.
Uppermost Seatpost Height – the gap from the highest point of your frame’s seat collar to the center of your seat rail clamp when your legs are fully extended.
- Overall/total length
The gap from the base of the post (excluding any triggering instrument) to the center of the saddle rail locks.
Compatibility & fitting
- Seat tube diameter
Seatposts come in a few distinct measurements, and dropper posts are the same. It’s crucial to pick the correct width of the dropper post that relates to the diameter of your bike frame’s seat tube, or it won’t fit on your bike. You can discover the width of your seatpost by removing your existing seatpost and searching for a number stamped or printed into it, or by taking a gander at the specs of your bike on the web. The most widely recognized seatpost measurements for mountain bikes are 30.9 mm & 31.6 mm, yet 27.2 mm (generally road) – 34.9 mm exist as well.
- Insertion length
The most important step is making sure you pick a dropper post with the correct Insertion length and General length. The general length is just the point at which it is completely extended, whereas insertion length manages how far into the edge the dropper post extends out. These estimations are significant for a few reasons such as:
- You need your dropper post to fit you, the rider
- Your dropper post needs to fit into your bike’s seat tube
Since bike geometry has advanced throughout the years, seat tubes have gotten tinier, and curves in the tube have turned out to be increasingly normal, therefore, the insertion length is essential to ensure a dropper post is perfect with your frame. Moreover, all dropper posts will have the least insertion length, managing how far into the frame the post must rest to abstain from spoiling the internals or cracking the post.
- Travel
The travel estimation of a dropper post directs how far the post can broaden. To select the right travel dropper post, gauge from the seat post collar to the seat rail (in your mounting, or maximum setting) on your present bike. Deduct 50 mm from this estimation and the subsequent number is the greatest travel length dropper post you can easily run. A lot of movement can put the seat height excessively high, in any event, when climbing.
How do I know what size dropper post I need?
Similar to fitting any seatpost, one has to distinguish the inner width of your bike’s seat tube. This is normally inscribed on your present post in mm (millimeters) or you can allude to the frame producer’s provisions. In case you’re unable to locate either, simply measure it yourself along with a set of Vernier calipers. The majority of seat post sizes are all practically standardized, with 27.2mm, 30.9 mm, and 31.6 mm being the most well-known.
In the event that you have a bike with 2 larger dimensions, you’ll find a wide variety of dropper posts available to you. Riders with a 27.2 mm post may discover their options are a little restricted, as the smaller dimension makes it difficult to fit all the necessary internals for inward routing.
How much travel should my dropper post have?
The overall goal may be to get the lengthiest travel dropper post you can from a financial standpoint, as it’ll permit you the most freedom for pedaling. With certain dropper posts reaching an astounding 200 mm of drop, there are a myriad of travel distances available. Nevertheless, as a general rule, you’re probably going to be restricted by various elements.
Initially, you have to figure out the greatest measurement of drop your frame and all-out saddle tallness will permit. Begin by estimating from the highest point of your frame tube to the highest point of your saddle rail after it’s at your ideal pedaling stature, taking note of the measurement.
You, at that point, should research the dropper post you had in mind, review it completely and gauge it from the highest point of where the saddle rail would go to the spot that is the lowermost the post could fix in a frame — normally a collar at its highest point
Detract one from the other and the number you’re left with is the hypothetical greatest dropper post-travel you could take with that model. Anything below it will fit fine & dandy, yet you’ll clearly be confined to the travel choices the maker offers.
It’s important that not all droppers are equivalent here — several will be longer in general for an offered travel, which means they may be too tall contrasted with an alternative model of similar travel that fits. There’s no genuine method to differentiate from gauging, either.
How do you fit a dropper post?
When you’ve picked your fresh dropper post, now is the time to get it set up on your bike. You can carry it into a shop, or do this without anyone’s help. The procedure is genuinely clear, in spite of the fact that outfitting inside routed cables can be vexing (reflect stringing a needle, however via your bike frame). Important things to focus on here are the size of the remote and also the size of the cables. When appropriately fitted, the seat post at full extension should be at your preferred height for climbing.
Afterward, locate the most efficient spot on the handlebars for your dropper remote. The easier it is to access, the quicker you’ll adjust to using it. With front derailleurs consolidating down to 1x drivetrains, many riders have opted to put their dropper remote on their handlebars close to where their front shifter formerly was.