
When it comes to Mountain Biking, most riders know that safety is the most important factor to keep in mind.
And for good reason.
Mountain Biking can be dangerous if you do not take the right precautions.
One of the main things that needs attention, is your Mountain Bike.
Due to the stress of riding, your Mountain Bike can have damaged, misaligned, or loose parts.
To mitigate any issues when you’re out on the trail, it is recommended that you always do a Pre-ride safety check.
In this article, we go over all the areas you need to check before a ride, along with a few tips for riders who want to safely check their Mountain Bike.
You can actually safely check your Mountain Bike by checking these four main areas; The Frame, the Wheels, the Brakes, and the Drivetrain. You want to inspect not only for damage but also for misalignment or loose parts. In this article, we help you learn how to do just that.
And don’t worry if it seems like a lot at first. Once you have a routine, this will be a quick and easy process that pays you back time and time again.

What you Need to Safety Check your Mountain Bike Before a Ride
When it comes to safety checking your Mountain Bike, a lot of it comes down to a visual inspection.
However, you will also need some of the most basic tools.
- Tire PSI Meter
- Basic Multi-tool
- Chain Checker
- Patience
- Consistency
Above all else, the most important tools in your arsenal are Patience and Consistency.
A lot of the time, you are not going to want to safety check your Mountain Bike.
On top of that, it is going to be easy to just skim over your bike in a hurry.
This works most of the time but is a risky game with severe consequences.
By having patience with not only your bike but also yourself, you are able to catch any potential safety issues with your Mountain Bike.
Along with patience, you are also going to need Consistency.
It defeats the purpose of a pre-ride safety check if you only perform them once every blue moon.
As you develop the habit of checking your Mountain Bike, you will learn what you can and cannot get away with.
But you must first be consistent with your routine.
What to Check
Now that we have you a quick rundown of the areas you should safety check, we will break down each part.
This will help you know when and how to go about it.
1. Check Tire Pressure

Tire Pressure is one of the most important things to check on your Mountain Bike.
In fact, some riders check and adjust their tire PSI religiously.
How – For this one, you will need a tire pressure gauge and a quick look at a PSI Guide like this one from Bicycling.com. Once you have a good idea of the correct tire pressure for your weight and riding preference, use the tire pressure gauge and a tire pump to match the recommended PSI. Give yourself time to test and adjust that PSI before you ride the trail.
Why – Your MTB tires are the only thing keeping you and your bike in contact with the ground, so proper inflation is a must. Improperly inflated tires can burst, roll or fold if they are not regulated. This makes them a safety risk on turns, bumps or any rough trail.
How Often – You should check your tire pressure before every ride. Once you notice a trend and establish a preference, you can adjust the frequency.
2. Check Tires

When you’re taking the time to check the tire pressure, this is also a great time to check the actual tires themselves.
Even if your tires feel fine, there can be damage or issues that go unnoticed.
How – You can check your tires with a visual inspection or by running your hands along the rim and tire wall. You are looking for cuts, bulging, or significant wear.
Why – Damage to your tires can often go unnoticed until it’s too late. On top of this, if you notice any excess wear, it will help you determine if there are any issues with other bike components.
How Often – Since it is such an easy check, you should try to inspect your tires before every ride.
3. Check Quick Release and Thru Axles
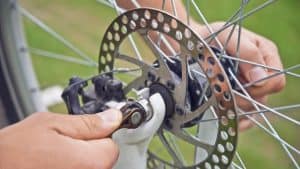
Another thing that even the most avid riders may forget to check, is their quick-release systems and thru axles.
This is one of the best safety checks to perform after you have worked on your bike or made any adjustments to the wheels.
How – You can easily perform a visual check to see if the axles are still in place, but also make sure they are tightened to spec.
Why – Your thru-axles and quick releases secure your wheels to the Mountain Bike frame. If they ever become loose or misaligned, this could end in a really bad situation. Although they rarely wear out from ride to ride, it is still an important area to check.
How Often – Every ride, especially when you disassemble the bike after rides.
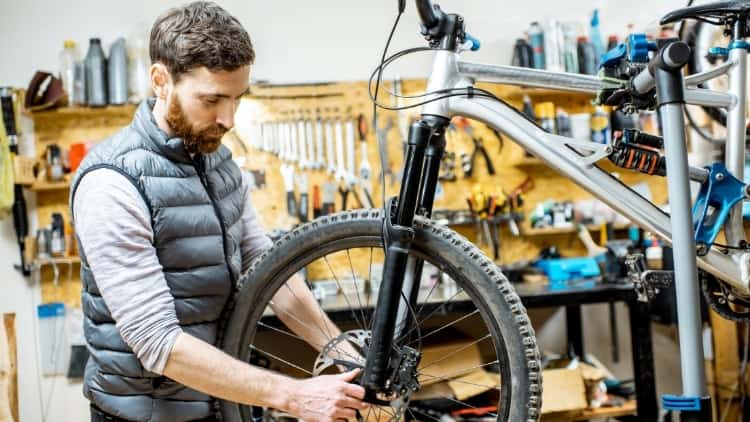
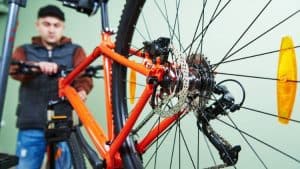
4. Check Brakes

On a Mountain Bike, your Brakes can be the difference between a safe ride and a dangerous risk.
This is especially true for those who use Rim brakes, as there are many ways they can fail.
Luckily, you can prevent any issues with your brakes with a few visual checks and simple adjustments.
How – Start by examining the pads and/or alignment of the brakes and wheels. If you notice anything out of alignment, use a multi-tool to tighten everything back in place. Check for excessive wear on the pads or any movement when you apply braking force. Once you feel confident that the braking mechanisms are aligned and tightened properly and the pads have enough material, it is time for a test run. Get up to a comfortable riding speed and apply a steady and consistent braking pressure. Note any delay, friction, or squealing in the brakes or brake lines.
Why – On a Mountain Bike, there is no safe way to stop if your brakes fail. And Mountain Bikers use their brakes a lot. Worn, loose, damaged, or misaligned brakes can get caught in the wheel, fall, or even fail altogether. By completing a few simple checks, you can prevent any safety concerns and ride comfortably.
How Often – You should check your brakes before and after every ride.
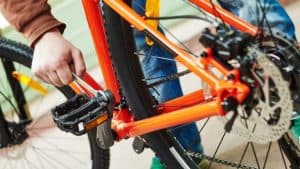
5. Check Crank Arms, Bottom Bracket and Pedals
The drivetrain is made up of quite a few components, all playing a vital role in helping you get going.
One of the most important areas is your Crank Arms and Pedals.
This is one of 3 areas where you connect with the Mountain Bike, so the safety required here is way higher.
How – Grab your Mountain Bike frame and one of the crank arms with a firm grip. Holding the bike still, try to flex the crank to check for play in the Bottom Bracket. While you’re down there, go ahead and give your cranks and pedals a once over.
Why – As I mentioned before, your cranks and pedals are one of three areas you contact the Mountain Bike. Having a loose or failing component here is extremely dangerous.
How Often – Luckily, your Bottom Bracket and Cranks are able to take a beating, so they only need to be checked if you start to feel or see damage.
6. Check the Stem and Headset
On top of checking your handlebars, your Stem and Headset also take a lot of stress while riding.
They are the only way you can direct inputs on your bike and can really cause a problem if they fail under stress.
How – Visually check your stem for damage or wear. Use a torque wrench to check how tight your stem bolts are.
Why – Mountain Biking consists of a lot of high-stress moments that put pressure on your handlebars and headset. A stem bolt that is not tight enough, can result in twisting handlebars.
How Often – Weekly
7. Check Chain

Your bike chain is the driving force behind your Mountain Bike. Without it, we would be pushing bikes with our legs.
Due to the nature of Mountain Biking, your chain is subjected to some of the most stress of any component.
Whether you’re cranking out up a hill or crunching through gears, there are many ways they wear down.
To avoid being stuck halfway up a hill with a busted chain, try to remember to check your bike chain before a ride.
How – Visually inspect your chain for wear, rust, chips, or damaged links. You should also check your chain with a Chain Checker according to how often you ride, even if you have to check weekly.
Why – Your chain is prone to breaking if you forget to check and care for it. When they do break, they don’t just leave you stranded, they can cause all types of havoc on the way out.
How Often – Weekly
8. Check for Play in the Fork
The front suspension fork is built to take a beating, but that’s not to say it’s without fault.
Stanchions can wear down, bearings fail and parts can loosen.
Since the fork is such a high-stress area, it requires extra care and attention.
How – If you can, lock out your front fork. Holding both brake levers with a firm grip, rock your bike back and forth. If you feel play in the front fork, it is time for a service.
Why – Front forks take such a beating that they often require yearly servicing. The time from when a fork starts to wear to when it fails is a short time and an unnecessary risk.
How Often – you can check for play monthly, however, try to service your forks yearly.
What is the M Check?
The M check is a bike check that starts at the front hub and works all the way back, assessing all moving parts along the way.
It is named due to the shape the check makes as you work your way around the Mountain Bike.
Why you should Always Safety Check your Mountain Bike Pre-Ride
Although there are many reasons why one should safely check their Mountain Bike before a ride, here are two of the most common.
- Ensure Safety on the trail
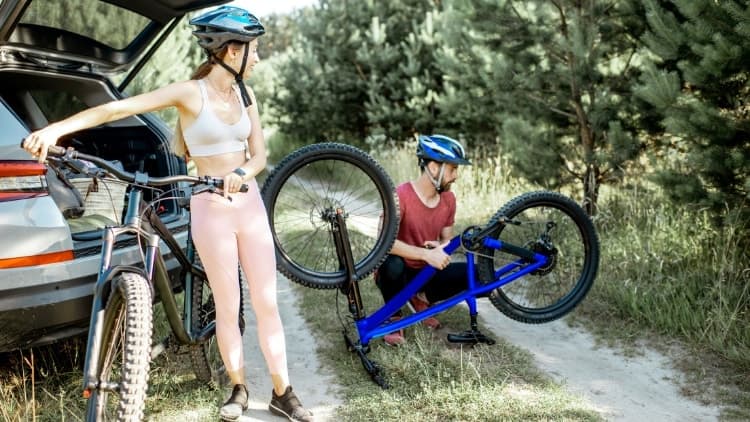
- Bikes can be damaged in storage or transit
With a little practice, you can implement a routine that really helps you when you’re out on the trail.
Conclusion
In conclusion, performing a safety check on your Mountain Bike is one of the best ways to stay safe out on the trail.
By sticking to a routine and remaining consistent, you can streamline the process and ride in peace.
I hope you found this article helpful, good luck and safe riding!