
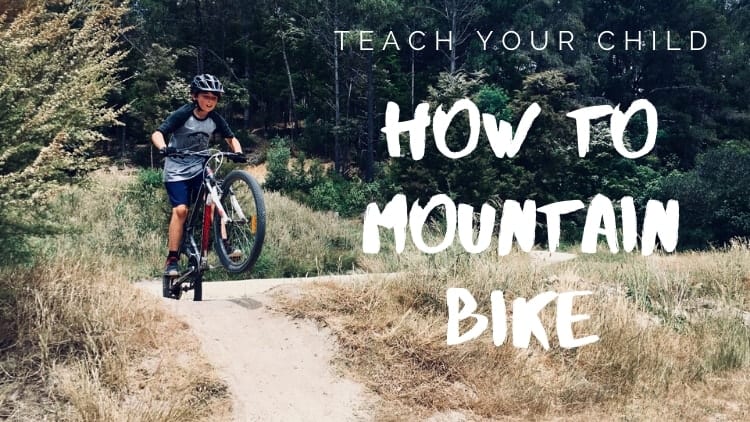
Whether it’s the beautiful scenery, teeth-clinching thrill ride, or camaraderie that comes from being with your good friends, Mountain Biking is one of the most rewarding experiences you can have. Even more rewarding is the opportunity to share these experiences with the ones you love, your children.
In fact, most riders with children dream of the day their kids finally decide to start Mountain Biking.
But it can be a bit of a mystery knowing when to introduce them and how to go about it in the first place. As all parents know, a new experience can become a bad experience really quickly when it comes to kids. And not to mention how scary Mountain Biking can seem at first.
Fortunately, I have had plenty of success introducing my own child to Mountain Biking. After getting his final approval that Mountain Biking was his best experience to date, I offer this guide to help you introduce your kids to Mountain Biking as well.
Teach them to use all the features of a Mountain Bike along with the skills and etiquette necessary to safely ride a Mountain Bike trail. Be patient and supportive as they learn at their own pace and above all, make the experience as fun as it’s been for you.
Get the Right Bike
• Fit is the most important factor when starting
• Try to start with an actual Mountain Bike – a bike with gears, hand brakes and suspension
• Don’t worry if your child is not yet ready for the larger bikes
• Visit your LBS if possible
Starting things off, to do the right job, you need the right tools. And things are no different when it comes to Mountain Biking
The first thing you need to get is the right bike. And since no child is the same, the best bike for your child will be slightly different than others. Here’s an article on the different types of Mountain Bikes.
The goal is to start with an actual Mountain Bike – a bike with a front suspension fork, hand brakes, and gears. These features are vital for Mountain Biking.
Unfortunately, Mountain Bikes only come in wheel sizes 20” and above, so smaller riders may have to find a bike that fits in size but may be lacking all the features of a Mountain Bike. Don’t worry if your child is not yet at the size for Mountain Bikes, any bike will do when first starting out.
For beginners, the most important thing about the bike is that it fits.
Even if a Bike has hand brakes and gears, if your child doesn’t fit well on the bike, they will have a bad time.
As your child starts to grow, they will eventually reach the size where manufacturers start making Mountain Bikes, and you can upgrade to a Bike that has gears, hand brakes, and suspension.
If you are able, try to make a trip to your Local Bike Shop. The techs there can help you find the best-fitting bike for your child and can also offer more suggestions on getting a good start in the sport.
Get the Right Gear
• Wear a Helmet!
• Closed-toe shoes and no loose laces
• Basic First Aid Kit just in case
Next up, you have to make sure you have the appropriate gear for riding.
For most riders, all you really need are the essentials; a helmet, shoes, and first aid.
Helmet – Helmets are actually pretty cheap, like this Kids Bell Helmet from Amazon. And believe it or not, a Bike Helmet is really the only thing you need to safely hit the trails. Since you’re trying to set the best example for your kids, try to always stress the importance of wearing a helmet every time they ride their bike. Falling is a natural part of biking and wearing a helmet will give you peace of mind that the most important areas are protected.
Shoes – Shoes are something you can definitely get specifically for Mountain Biking and in fact, your child will need them if they ever get serious with their Mountain Biking, however, for most beginners, a basic pair of tennis shoes should suffice. Try to avoid shoes with loose or long laces, as they can get stuck in the gears or chain. And make sure they always wear a closed-toe shoe.
First Aid – Finally, it is always good to carry a basic first aid kit. As I mentioned before, falling is a natural part of the learning process, so make sure you have a few Band-Aids and alcohol swabs handy.
Get Them Comfortable Riding a Bike
• Start on roads or pavement
• Ride as often as possible
• Allow your child to get adjusted on their own time
• Consistency is key
Long before your child ever sets foot on a Mountain Bike trail, they should first have plenty of experience just riding a bike.
The skills learned after plenty of time riding a bike prove to be invaluable when it comes time to ride their first Mountain Bike trail.
Leaning during turns, balancing your weight while braking and general maneuvering are all skills that are learned from consistent practice on the bike. Once your child has these things down pat, they are ready to start to apply them to a Mountain Bike trail.
If traffic allows it, take frequent rides through your neighborhood or at your local park or greenway. As your child gets more comfortable on the bike, you will notice the improvement in their riding and chances are, they will begin to get more “adventurous” on the bike.
This was the case when I was first teaching my son to ride his bike at our local greenway.
Although our greenway is mostly flat, there were a few sections with steep hills and climbs that he struggled with. I would always find myself guiding him down a hill or around a sharp turn. After we began riding more often, I noticed how great he was at controlling the bike and no longer worried about him taking sharp turns. He even wanted to start riding down the steep hills by himself.
The more you ride, the more comfortable your child will be, and the less challenging Mountain Biking will look once you finally start.
Start to Mention Mountain Biking
• Introduce Mountain Biking before you hit the trail
• Let your child decide to Mountain Bike as opposed to forcing it
• Mention how fun Mountain Biking is
Not to sound ridiculous, but you can actually mentally prepare your child for Mountain Biking.
Mountain Biking can sound intimidating to most kids and it’s best to slowly introduce them to the concept before throwing them on a trail.
And you can actually start doing this when their getting adjusted to riding their bike.
My son was not big enough for an actual Mountain Bike when he first started riding. And the small size of the bike he was riding kept us mostly riding at the greenway and on paved sidewalks.
This actually turned out to be a good thing, as he was not too fond of the idea of riding on the crazy trails I always came home raving about.
As he got more comfortable and adventurous on his bike, I started to mention how fun Mountain Biking was compared to the stuff we were riding.
I noticed that he liked to ride over the bumps and through the grass, so I mentioned the similarities of Mountain Biking and how it was full of fun obstacles like the ones he liked riding.
Before long, he was really interested in taking his bike to a Mountain Bike trail.
Get them Comfortable using Hand Brakes
• Hand Brakes are a must for Mountain Bikers
• Start with the rear brake and then add the front brake
• Adjust the brake levers so they are easier for your child to pull
• Be patient as they build strength in their fingers
If you grew up riding bikes or have bought bikes for your kids in their younger years, you’re probably used to the “Coaster Brake”- the pedal brakes that work when you push backward on the pedals.
Unfortunately, the Coaster Brake is one of the first things to let go of once your kids get interested in Mountain Biking.
Mountain Biking requires more movement and modulation on the bike, so Hand Brakes are a requirement for anyone interested in riding Mountain Bike Trails.
Again, don’t worry if your child is not yet ready to start riding a bike with Hand Brakes. Coaster Brakes will still teach them a degree of Brake control and weight balance on the bike.
Just know that Hand Brakes are a requirement if your child wants to ride more often or on more advanced trails.
My son was well adjusted to the Coaster Brake when we finally upgraded him to a real Mountain Bike. He initially struggled with the concept of using both Hand Brakes in conjunction, so I made sure to encourage good technique for a beginner.
When you introduce Hand Brakes to your child, let them know the difference between the rear and front brake and the effect of using them in conjunction.
The rear brake is the first brake they should begin to use, and once they are comfortable with pulling brake levers, slowly introduce the front brake.
The front brake will provide the most stopping power but can slide out or flip them forward if pulled too hard or while turning.
Be patient with your child as they learn to use the brake levers and build their strength in their hands, beginning to use hand brakes can be really tiring on their smaller hands.
Another tip is to adjust the brake levers to where they are closer to the handlebar grips, this will lessen the distance your child has to reach to grab the brake lever, and will also give you a chance to adjust the sensitivity of the brakes.
If you need assistance adjusting the brake levers on your bike, check out this video from Park Tools.
Introduce them to Changing Gears
• Gears are needed for the different situations mandated in Mountain Biking
• Children can struggle with changing gears in addition to the concept.
• Be ready to help them change or adjust gears before and after obstacles
• Practice on paved and flat surfaces before hitting the trail
Another vital component of Mountain Bikes is the gears.
Gears consist of the assemblies between the crank and rear hubs that allow the rider to change the speed and resistance at which they pedal.
This is so important as Mountain Biking forces riders to use this range of gears in many situations, such as climbing hills or maintaining speed.
When my son first started riding, he could only fit on a 16” bike. Since Mountain Bikes only come in wheel size 20” and above, he had to settle for a bike without gears.
I was a little worried about this when I first started taking him to my local greenway. In addition to being over 6 miles long, the greenway had a few really hilly sections and turns.
Since my son had no way of changing gears, I had a feeling the climbs and distance would be too much for him.
Surprisingly, he never complained.
Of course, I made sure to stop frequently for breaks and even resorted to pushing him in some situations, he always adjusted well.
Once he was finally able to fit a 20” bike, the concept of gears was really foreign to him.
In addition to his struggle in actually rotating the mechanism to change the gears, he didn’t really feel the need to change them as often as I recommended.
The key to this step is to allow them time to adjust to gears on their own.
I recommend riding at your local greenway or similar paved sections, so they can develop their own preferences as time passes.
Introduce Standing Up on the Bike
• Vital skill for riding Mountain Bike trails
• One of the scariest steps to learn for new riders
• Make sure you hold them to help guide them on their first few attempts
Once your child is adjusted to the features of Mountain Bikes, it’s time to work on the skills that riders use out on the trail.
One of the most used skills on the bike is the ability to stand up on the pedals.
Unlike Road Bikers, Mountain Bikers do a good amount of riding standing up on the pedals.
This is due to the fact that trails are full of obstacles, dips, and hills, all aimed to keep the rider focused and engaged.
By standing up on the pedals, riders are able to bend and maneuver over obstacles and rough areas. Riders are also able to better handle the bike while standing up, something that is more than necessary out on the trail.
Again, make sure you’re patient when introducing the concept of standing up on the pedals, as this will feel really unsteady at first.
Encourage your child to try this only when you feel confident in their balance on the Bike and make sure you’re walking beside them when they first start to stand up.
Once they feel a little more comfortable with standing up on the Bike, it is time to move on to one of the more specific lessons.
Introduce Pedal Position and Turning
• The importance of pedal position in Mountain Biking
• Keep the pedals even at the 9 and 3 position
• Dropping or staggering pedals during turns
Now that your child is starting to practice standing up on the bike, it’s time to practice a skill you may not have thought of – Pedal Position.
Pedal Position is surprisingly important to Mountain Biking and trust me, it’s something you want to practice before you head to your local trail.
Since Mountain Bike trails are full of rocks, roots, and sharp turns, hanging a pedal too low can cause a “pedal strike” or worse.
And just so you know, a pedal strike is where your pedal hits either the ground or an object, potentially sending you flying or causing you pain.
Naturally, most riders will ride with their pedals resting in the 12 and 6 positions, like in the picture below.

While this seems appropriate in most instances, Mountain Bikers need to learn to balance their pedals at the 9 and 3 positions like below.

Keeping your pedals even is actually the best pedal position for most situations, with the exception of turns.
If your child has been riding for a while, it may take some practice and consistency before they become more familiar with the pedal position.
Just remember to be patient and supportive while they learn.
Once they start to get more adjusted, you can start to introduce the pedal position during turning.
And chances are, they are already dropping and raising their pedals correctly on turns.
Prepare Them for the MTB Trail
• Let them know how Mountain Bike trails work
• Give them a heads-up to the different features and obstacles
• Go over basic trail etiquette and safety
In addition to the skills necessary to ride Mountain Bike trails, you also need to teach them what to expect when they first start riding.
The last thing you want is for them to be overwhelmed on their first ride.
To simplify the process, you really only need to focus on two things; How Mountain Bike trails work and what trail etiquette they need to know.
What to Expect – There are a lot of styles of riding and Mountain Bike trails, so make sure you give your kid a heads-up as to how they work and what to expect. From the difference between beginner and advanced, downhill and cross country, and directional to singletrack. It’s usually best to start on a trail you know well and can provide guidance on.
MTB Trail Etiquette – There are rules to Mountain Bike trails and it’s a good idea to tell your kids how to respect the trail and other riders who choose to enjoy it. This includes things like giving riders going uphill the right-of-way and refraining from damaging the trail or littering in any way.
Find Beginner Trails to Start on
• Always start on Beginner MTB trails
• You can ride off-road just about anywhere to practice
• Use websites like Singletracks or MTB Project to find suitable trails
When your child first starts Mountain Biking, it is very important that they slowly build up their skills.
Even the Beginner Mountain Bike trails can be a little challenging to new riders, so you definitely want to avoid any advanced or long trails starting out.
Naturally, kids will start to push their limits once they start to get comfortable on their bikes.
If your child decides to take a chance on their bike, it is best that they take that chance on a forgiving trail like most of beginner Mountain Bike trails.
Hop on a website like MTB Project or Singletracks and find the nearest beginner Mountain Bike trail in your area.
Make sure you have your child start on these trails before they begin venturing out.
The great thing about Mountain Bike trails is that they can be as fast and sketchy or as safe and slow as you choose.
As your child begins to get better on their bike, the Mountain Bike trail will start to change beneath their tires.
All of a sudden obstacles become launching points and hilly sections become opportunities to maintain speed.
The main goal is t take it slow when your child first starts out.
And if you can’t find a beginner trail near your house, you can always drive around your backyard or other off-road areas near your home.
Be Patient and Supportive
• Every child learns at their own pace
• Patience and Support are necessary throughout the learning process.
You probably noticed an overarching theme throughout this entire article and that is to remain supportive and patient while your child learns to Mountain Bike.
This is huge.
No kid is the same and you will have to adjust your teaching methods and timeline based on personal experience.
If you want to make sure your child gets the most out of this new experience, make sure there is no reason for them to get frustrated with themselves or Mountain Biking.
It helps to let them know that you struggled as well with Mountain Biking or anything new that you learned.
If your child sees that you’re getting frustrated or impatient, they will associate Mountain Biking with a bad experience and may never learn to like it again.
Make it Fun!
• Don’t forget why we do it, make it fun!
Coming from the last point, in addition to patience and support, there is one vital aspect to this that will help you develop a real fan of Mountain Biking.
You have to make the experience fun.
Above all, your child wants to have a blast as much as you want them to. Every chance you get, try to make the experience fun.
Whether you’re cheering them on or having a conversation, this is the real step that helps you make your child a real Mountain Biker.
Conclusion
In conclusion, there is not too much to teach your child about Mountain Biking.
With a little support and practice, they will be hitting the trail in no time.
Again, have a fun and safe riding!