
When I finally decided to get a motorcycle, I must have spent hours preparing for the MSF course. I had watched what I thought were millions of videos just on how to ride.
It wasn’t until I reviewed the motorcycle controls and really understood them, that I finally had the confidence to sign up to take the course.
In this article, I will go over all the motorcycle controls as well as some things you need to know.
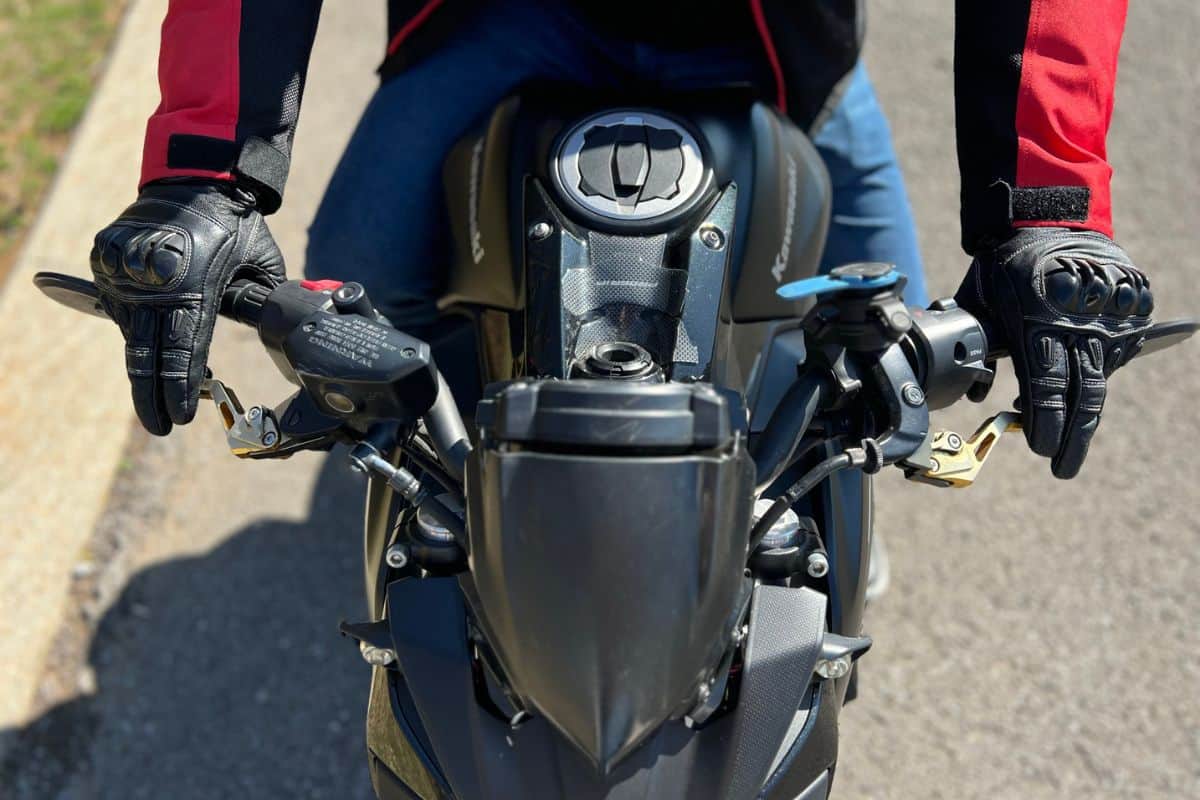
The Left Handlebar Controls
The left handlebar of a motorcycle is your command center for several key functions. It’s essential to become familiar with these controls as they play a critical role in safe riding.
Clutch Lever: This is your primary connection to the bike’s power. Squeezing the clutch lever disengages the engine from the transmission, allowing you to shift gears smoothly. It’s crucial to practice feathering the clutch to find the ‘friction zone’ for controlled starts and stops.
Indicator Lights: These are your communicators with other road users. The indicator lights, or turn signals, are activated by a switch on the left handlebar. Always ensure to signal your intentions well in advance of making a turn or changing lanes.
High/Low Beam Switch: This switch controls the intensity of your headlight. Use the low beam during daytime or well-lit roads, and the high beam in darker conditions to see further ahead. Remember, it’s also a tool for making yourself more visible to others.
Horn Button: The horn is a vital safety feature, not just an accessory. Use it to alert others of your presence, especially in situations where they may not see you. The horn button is conveniently located for quick access without having to take your eyes off the road.
Choke Control: If your motorcycle has a carburetor, the choke control helps with cold starts by enriching the fuel mixture. It’s typically used to start the engine when it’s cold and should be turned off once the bike warms up to avoid flooding the engine.
The Right Handlebar Controls
Mastering the right handlebar controls is just as crucial as the left, as they manage the motorcycle’s power and safety mechanisms.
Starter Switch: This is your go-to button to bring your motorcycle to life. Located typically beneath the throttle, the starter switch ignites the engine when pressed, provided the clutch and engine cut-off switch are in the correct positions.
Engine Cut-off Switch: Safety first! This switch is designed to immediately shut down the engine in case of an emergency. It’s a red switch, usually found right above the throttle, making it easily accessible.
Throttle: The throttle is your motorcycle’s accelerator. Twisting the throttle towards you increases the engine’s RPMs, propelling the bike forward. It’s all about gentle twists to maintain control and speed.
Front Brake Lever: Responsible for the majority of the bike’s stopping power, the front brake lever should be used with care. Apply it smoothly and progressively to avoid abrupt stops that could lead to a loss of control.
The Foot Controls
Your feet are just as engaged as your hands when riding a motorcycle. The foot controls are intuitive yet require practice to use effectively.
Gearshift Lever: Located on the left side of the motorcycle, the gearshift lever is a pivotal control for changing gears. You’ll use a toe-and-heel rocking motion to shift up and down the gears. It’s important to get a feel for the gearshift’s pattern and to use the clutch lever in conjunction with gear changes for smooth transitions.
Rear Brake Pedal: Positioned on the right side, the rear brake pedal controls the rear wheel’s brake. It should be used in harmony with the front brake to ensure balanced stopping power. Apply it gently to avoid locking the rear wheel, especially on slippery surfaces or during quick stops.
The Instrument Panel
The instrument panel is your dashboard to the motorcycle’s performance and status. It provides vital information at a glance, keeping you informed and safe on the road.
Speedometer: This gauge displays your current speed. Keeping an eye on the speedometer is crucial for obeying speed limits and riding according to road conditions.
Tachometer (if applicable): Not all bikes have one, but if yours does, the tachometer measures the engine’s RPMs. It’s a useful tool for optimizing gear shifts and maintaining engine health.
Fuel Gauge: This indicator tells you how much fuel you have left. It’s a simple yet essential gauge that helps you plan refuels and avoid being stranded without gas.
Odometer: The odometer tracks the total distance your motorcycle has traveled. It’s helpful for scheduling maintenance and understanding the longevity of your bike.
Warning Lights: These lights are the motorcycle’s way of communicating issues. They can indicate low oil pressure, high engine temperature, or charging system problems. Always heed these warnings to prevent damage or unsafe conditions.
Other controls
Beyond the primary controls, there are other features on your motorcycle that are essential for operation and safety.
Ignition Switch: This is where every ride begins. The ignition switch is usually located in front of the fuel tank and is used to turn the bike’s electrical system on and off. It’s also a security feature, as it requires a key to operate.
Kickstand: The kickstand, or side stand, is a small but mighty feature. It supports your motorcycle when parked and should always be retracted before you start riding. Some bikes have a safety switch that prevents the engine from running if the kickstand is down.
Mirrors: Your eyes on the road behind you. Properly adjusted mirrors give you a clear view of what’s happening behind and to the sides of your motorcycle, which is crucial for safe lane changes and turns.
Fuel Supply Valve: Also known as the petcock, this valve controls the flow of fuel from the tank to the carburetor. It’s important to know the positions of this valve: ‘On’, ‘Off’, and ‘Reserve’. Use ‘Reserve’ when the main supply runs out, giving you enough fuel to reach a gas station.
How to use the motorcycle controls
Understanding the function and proper use of motorcycle controls is essential for safe and enjoyable riding. Here’s a step-by-step guide to get you started:
Starting the Engine
- Ensure the motorcycle is in neutral.
- Turn the ignition switch to the ‘On’ position.
- If the engine is cold, use the choke control.
- Pull in the clutch lever.
- Press the starter switch to engage the engine.
- Once the engine starts, gradually release the choke control.
Getting Moving
- With the engine idling, pull in the clutch lever.
- Select first gear using the gearshift lever.
- Slowly release the clutch lever until you feel the bike’s ‘friction zone’.
- Gently twist the throttle to increase RPMs as you ease off the clutch lever.
- As the motorcycle begins to move, place your feet on the footpegs.
Shifting Gears
- Roll off the throttle as you pull in the clutch lever.
- Lift or press the gearshift lever to select the next gear.
- Smoothly release the clutch and gently apply the throttle.
- Repeat these steps for each gear change, upshifting or downshifting as needed.
Stopping the Motorcycle
- Release the throttle and apply both brakes evenly and progressively.
- As you slow down, pull in the clutch lever and downshift to first gear.
- Come to a complete stop and plant your feet firmly on the ground.
- Engage the kickstand before releasing the clutch lever.
Stopping the Engine
- Ensure the motorcycle is in neutral and the kickstand is down.
- Turn off the engine using the ignition switch or engine cut-off switch.
- Remove the key from the ignition to secure the motorcycle.
Common Questions
What are some common mistakes beginners make with motorcycle controls?
Beginners often face a few common challenges when learning to master motorcycle controls. Here are some of the most frequent missteps:
- Overlooking the Friction Zone: Many new riders struggle with finding and maintaining the clutch lever’s friction zone, leading to jerky starts or stalls.
- Neglecting Indicator Lights: Forgetting to use turn signals or failing to turn them off after a turn can confuse other road users and create unsafe conditions.
- Improper Use of Brakes: Relying too heavily on the rear brake or grabbing the front brake too abruptly can cause skidding or a loss of control.
- Throttle Control: Beginners might twist the throttle too aggressively, resulting in unexpected acceleration, or not apply enough throttle, causing the engine to lug.
- Gear Shifting: Missing gears, not fully engaging the clutch, or shifting at inappropriate times can lead to rough rides and mechanical wear.
Are there any tips for using the controls smoothly?
Smooth operation of motorcycle controls comes with practice. Here are some tips:
- Clutch Control: Practice feathering the clutch in a safe area to get a feel for the friction zone.
- Braking: Apply brakes gradually and use both front and rear brakes together for balanced stopping power.
- Throttle Management: Start with gentle twists and increase gradually as you become more comfortable.
- Shifting Gears: Listen to the engine’s sound and feel the bike’s response to learn the best timing for gear changes.
How can I remember all the controls?
Familiarity with controls becomes second nature over time, but here are some strategies to help you remember:
Visual Aids: Use a diagram of the controls and study it regularly.
Physical Practice: Sit on the bike while it’s off and practice reaching for and using each control.
Mental Rehearsal: Visualize yourself using the controls correctly while going through the motions of riding.
Conclusion
As a beginner, it’s natural to feel a bit overwhelmed, but with practice, patience, and a mindful approach, these controls will become second nature. Each ride is an opportunity to refine your skills, build confidence, and deepen your connection with your motorcycle.