The minute you get your first GoPro, you’re ready to hit the trails and start filming.
But before you get suited up for your epic ride, you must know the best GoPro setup for Mountain Biking so you can film the action. Especially if you want to capture the full experience of the trail.
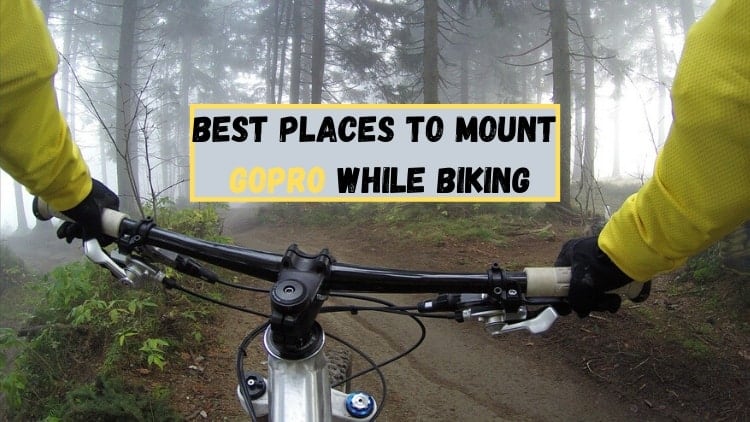
From personal experience, as well as advice from the experts, here are the best places to mount your GoPro for Mountain Biking.
1. Chest
2. Helmet
3. Handlebar
4. Seat Post
5. All
Helmet and Chest mounts are the most popular mounting positions when it comes to Mountain Biking.
In fact, most MTB YouTubers are using either a Helmet or Chest Mount setup to film their videos.
Like Seth’s Bike Hacks, The Singletrack Sampler, and Daily MTB Rider.
But why are these mounting angles so popular and when should you use them?
Angles and How They Affect Footage
So why are there so many ways to mount your GoPro and what are they for?
Each mounting position allows you to catch a different angle on the action, creating a more dynamic view and a more compelling story with your footage.
Take a look at some of your favorite YouTube videos involving Mountain Biking. What do you notice about the POV shots?
• You can see the rider Handlebars in the frame
• You can also see most of the trail
• Most videos appear to be shot from below the chin
While there’s definitely more to it, these few features give you a basic understanding of why the videos are so engaging.
For starters, having a subject (the rider) in the frame gives us a reference point for the action. This allows us to relate to the scene and can almost feel like an immersive experience if edited correctly.
In addition to the subject, you also get a great view of the trail around them. GoPro’s are great at taking wide-framed videos, which helps riders capture the environment around them. And the beauty of nature when Mountain Biking is one of the top reasons to ride in the first place. This is why GoPro’s are so important to a rider’s MTB camera setup.
Lastly, you can get a better sense of the rider’s speed on videos where the camera angle is lower to the ground, as opposed to higher. The Loam Ranger did a great job explaining this in one of his videos when he compared the speed of a jet to a hand waving in front of your face. Although a jet is flying hundreds of miles per hour, the fact that it’s so far away makes it look like it’s moving at a crawl. Compare that to a hand waving in front of your face, which seems like it’s moving a lot faster than the jet. This is simply due to the fact that your hand is closer to your view, although it’s a lot slower than the jet. Keep this in mind when you start filming.
To further drive this point, take a look at the two videos below. Which one feels more engaging to you?
https://www.youtube.com/watch?v=bgd5RZSZpbMhttps://www.youtube.com/watch?v=WtUUKHW_uUU
The one on the right does a great job of showing you the action. It has a good angle on the speed, you can clearly see the trail and there’s a good view of the rider in the frame.
The one on the left doesn’t do as well of a job, as there is no subject in the foreground for reference and all you get is trail. In addition to that, the terrain comes out to appear very flat and uninteresting.
Where to Mount GoPro for Mountain Biking
So Helmet and Chest Mount seem to be the clear winners, right? Not always.
In fact, having a GoPro Mounted to your Chest or Helmet is no guarantee of great footage.
To decide where you need to mount your GoPro, you must first confirm a few things.
Firstly, what is the purpose of the video you’re filming?
Are you trying to capture your sick riding skills? Are you wanting to capture more of the scenery around you? What if you’re mainly vlogging on your ride? What about when you’re off the bike and fixing a flat, should you change the position?
Depending on the story you are trying to tell and what you’re trying to convey, you should mount your GoPro accordingly, with the base understanding of how different angles provide different experiences.
To better help you understand the best place to mount a GoPro, I will break down the different mounting positions, from most used to least. As well, I will add a few tips and tricks on when and where to use each.
1. Chest Mount
Arguably the best GoPro mount for Mountain Biking, the chest mount has become the most popular GoPro mount for good reason.
Not only are you able to catch great shots of the rider and the trail within one frame, chest mounts are also one of the most versatile mounts you can use.
With the introduction of the Gimbal, chest mounts became the perfect mounting solution for the added gear and extra weight.
They keep your camera out of the way when riding and provide a natural “backpack” feel as opposed to more intrusive mounting positions.
Since you are wrapping a few tight straps around your body, make sure you get a quality chest mount.
I recommend the official GoPro chest mount or the Camekbak chest mount.
Chest Mount POV –
This is the POV you can expect when you wear a chest mount while Mountain Biking. As you can see, it’s pretty immersive and it provides a good view of the action and the scene.
When to Use a Chest Mount for MTB – You can actually use a chest mount for virtually all types of riding. It does make for a limited POV if you’re trying to capture more of the scenery around you, but you can always dismount it.
Pros and Cons of Chest Mounts
- Good view of action
- Immersive experience
- Unobtrusive camera setup
- Easily add Gimbal
- Relatively smooth footage
- Limited view when it comes to turns
- Can be shakier than Helmet mounts
- Chest mount can be uncomfortable
- Can “flatten” out the terrain in video
Tips for using a Chest Mount for Mountain Biking –
Make sure you mount your GoPro upside down, or else you’ll be videotaping your knees.
Doublecheck this angle!
Make sure straps are as tight as comfortably possible.
How to Mount GoPro on Chest
Mounting your GoPro on a chest strap is really easy, check out the video above for a how-to as well as an explanation. If you’re looking for the best chest mount for your GoPro, check out this official one on Amazon.
2. Helmet Mounts
Helmet mounts are up there with chest mounts and have even been the most popular mounting option for most of MTB history.
There are so many ways to mount a GoPro to your Helmet, with a few making for some really interesting angles.
Mounting directly to the top of your Helmet can give you a solid view of the trail and is often the most stable location to mount.
If you have a full-face helmet, you can also mount the GoPro just under your chin. This provides the great angle of a chest mount, with the added stability of a helmet mount.
Helmet mounts will always be the OG when it comes to Mountain Biking, and they’re just way too versatile to count out.
Helmet Mount POV –
This is the POV you can expect with a Helmet-mounted GoPro. It is slightly higher up than the chest mount but also loads more stable.
Ways to mount GoPro on a Helmet – There are plenty of ways to mount a GoPro on a Helmet, maybe even too many. You can put it on the top of your helmet, under the visor, on the side, under the chin, and even pull off the “unicorn mount” like Blake from GMBN.
When to use a Helmet Mount for MTB – You can use a Helmet Mount when you’re trying to capture the height of a ride or if you’re trying to get a creative angle on the action. Helmet mounts are also a solid choice for general-purpose footage.
Pros and Cons of Helmet Mounts
- Stable footage
- Get to see what the rider is looking at
- Great views of the scenery
- Most creative mounting positions
- Easy to setup
- Can be intrusive
- Can severely flatten out a trail
- Not as engaging without a view of the rider
Tips for using a Helmet Mount for Mountain Biking –
If you are using a Helmet Mount for Mountain Biking, try to get a little creative other than the standard top of the helmet mount. Stick it on the side or add a selfie stick for awesome self-shots.
How to Mount GoPro on a Helmet
There are many ways to mount a GoPro on your Helmet, the video above does a great job of showing you how.
3. Handlebar Mounts
The handlebar mount is often overlooked when it comes to filming with a GoPro.
Sure, the footage can be a little too bumpy and rocky for those longer shots, but if you’re trying to capture every detail of a section of the trail, you may be surprised to find how well it does.
This type of mount can definitely work if it’s the only way you have to film, but it works best in conjunction with the other mounts mentioned in this article.
The real creativity comes when you use the handlebar mount to aim your camera back at yourself. This provides a great view of the rider while their hitting all those extreme angles and features.
Just make sure to anticipate a few less-than-flattering scenes.
Handlebar Mount POV –
The video above shows you the angles you can expect when you use a handlebar mount. Check out how cool it is when you face it back towards yourself.
Ways to mount GoPro on your Handlebar – As I mentioned before, you can use the handlebar mount to get some great self-shots of your Mountain Biking. It can be a little rocky this way, but you can also mount it front-facing to catch great shots of the trail ahead. Feel free to get creative here.
When to use a Handlebar Mount for MTB – I would use a handlebar mount when you’re trying to capture a particularly rocky section of trail, or when you’re trying to get a good shot of yourself taking a sharp turn.
Pros and Cons of Handlebar Mounts
- Provides a creative angle for self-shots
- Great for capturing technical sections
- Easy to mount and access the camera
- Shaky footage
- Not great for longer shots
- Limited view of the trail
Tips for using a Handlebar Mount for Mountain Biking –
If you choose to use a handlebar mount, make sure you plan ahead for cuts. Also, take this time to find a creative angle on your riding.
How to Mount GoPro on Your Handlebar
There’s not much to mount a GoPro on a handlebar, buy yourself a swivel mount and check out the videos above for instructions.
4. SeatPost Mounts
The seat post mount is pretty niche when it comes to shooting Mountain Bike videos.
Just like a handlebar mount, a seat post mount can be positioned to face forward or backward. In fact, rear-facing is often the most popular way these mounts are angled.
They can add more of your bike to the frame, or you can use the opportunity to get great shots of the rider behind you.
I particularly like this type of mount for showing the steepness of a feature.
When rear-facing, this POV can add the back tire to a steep trail to really show you how steep it is.
Just make sure this isn’t your only mount, as it can get a little boring if it’s the only shot you filmed.
Seatpost Mount POV –
As you can see from the video above, a rear-facing shot with a seat post can make for some pretty good footage. Especially if you’re filming the rider behind you.
Ways to mount GoPro on your SeatPost – Although the seat post mount provides a creative angle, there are not too many ways you can mount it. Forward and rear-facing seem to be the most popular.
When to use a SeatPost Mount for MTB – As I mentioned before, the seat post mount is the go-to mount for filming rear-facing scenes. Send a friend up ahead of you with one, or film the rider behind you. I wouldn’t recommend this for too long of a shot, but you can also face it forward it capture more of your bike in the frame.
Pros and Cons of SeatPost Mounts
- Low to the ground angle
- Puts a subject in the foreground
- Can provide a creative angle
- Not as distracting when riding
- Easy to film behind you
- Very limited view of the trail
- Too many bikes in the foreground
- Not as stable as the chest and helmet mounts
Tips for using a Seatpost Mount for Mountain Biking –
Make sure you use this footage for shorter shots, as the shakiness can be off-putting on long rides. This mount also works best if you have someone riding with you.
How to Mount GoPro on your SeatPost
Again, this is a pretty simple mount, so you shouldn’t have too much trouble getting your GoPro set up. For added assistance, check out the video above.
Conclusion
In truth, the best place to mount a GoPro for Mountain Biking is a mix of all the mounting locations mentioned above.
Remember that you’re trying to tell a story with your video, making it as engaging and relatable as possible.
Get a good chunk of your footage on either the Helmet or Chest mount and then add a few creative POV shots from the handlebar or seat post.
In fact, you may be able to squeeze out all the creativity possible with a helmet and chest mount.
But it can’t hurt to try something a little different every now and then.
If you’re hoping to keep it simple, stick with a chest mount. This will give you the best POV for general videos.
For those looking to mix it up, have fun, and good luck with your gnarly mountain bike edits!