Getting a brand-new motorcycle is exciting, but before you twist that throttle and push your bike to its limits, you’ll need to break it in properly.
Think of it like stretching before a workout—you’re preparing your bike’s internal components for years of smooth operation.
Is It Really That Critical?
You may have heard advice like, “Ride it hard from day one,” or “Modern engines don’t need a break-in.”
While it’s true that modern manufacturing techniques have improved engine precision, this doesn’t eliminate the need for a proper break-in.
Letting the engine gradually adjust helps to maximize its performance and longevity.
Another common myth is that “break-in oil” is unnecessary; in fact, using the right oil during this period is essential to properly flush out any metal particles generated by the initial wear process.
By understanding the importance of this early stage, you’ll not only extend your motorcycle’s life but also enjoy smoother rides and better performance in the long run.
Understanding the Break-In Process
Why It Matters
When your motorcycle rolls off the showroom floor, its engine components are essentially brand-new and not yet accustomed to working together.
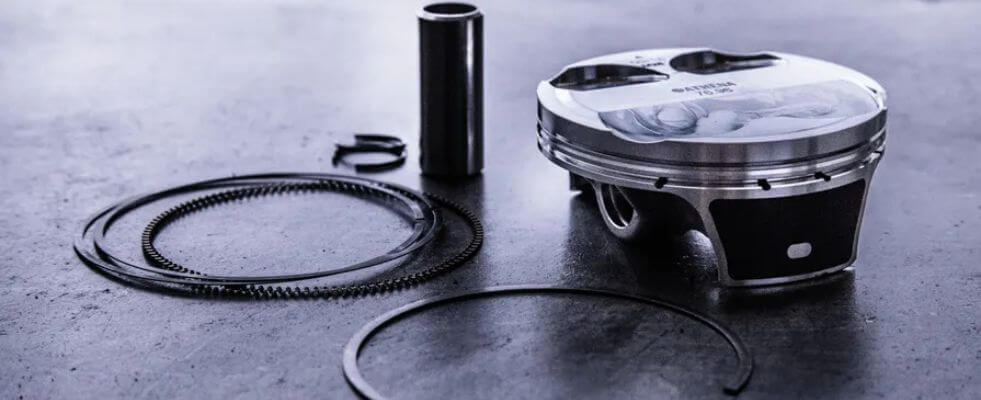
The break-in process allows parts like the piston rings, cylinder walls, and valves to wear into a snug fit.
Wear Patterns and Piston Rings
Piston rings are critical for sealing the combustion chamber, preventing oil from leaking into it, and ensuring efficient compression.
During the break-in period, these rings gradually seat against the cylinder walls, creating the proper seal.
If this process is rushed or mishandled, the rings might not seat correctly, leading to poor compression, higher oil consumption, and reduced power output over time.
Additionally, improper wear patterns can create uneven surfaces inside the engine, leading to increased friction and early component failure. This can result in costly repairs and a shorter engine lifespan.
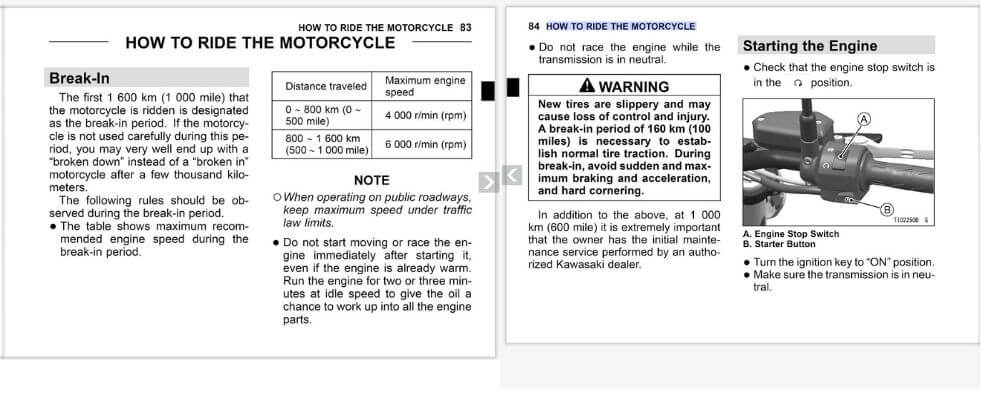
Manufacturer Guidelines
Different motorcycle brands have distinct break-in procedures based on their engine designs and tolerances. For example:
- Honda typically advises moderate RPM variation and avoiding full throttle for the first 600 miles.
- Yamaha may emphasize early oil changes and varied throttle usage to ensure proper component seating.
- Harley-Davidson tends to recommend more gradual speed increases, focusing on low-to-mid RPMs for the first 500 miles.
Quick Tip:
Always consult your owner’s manual for the exact procedure. Most manuals include a “break-in” or “running-in” section. If you’ve misplaced yours, many manufacturers provide digital copies on their websites.
Break-In Best Practices
Breaking in a new motorcycle is about more than just clocking miles.
Here are some essential best practices to follow:
1. Run the Engine Through All Ranges
One of the most important aspects of the break-in process is varying your engine speed. Riding at a constant RPM for long stretches can lead to uneven wear and glazing of the cylinder walls.
Instead:
- Accelerate and decelerate frequently to ensure the piston rings seat properly.
- Gradually increase RPMs over time without pushing the engine to its limits.
- Avoid using cruise control, even on longer rides, during the break-in period.
2. Avoid Lugging the Engine
Lugging occurs when you try to accelerate while in too high a gear, causing the engine to struggle.
This puts excessive strain on the components and can lead to premature wear.
Instead:
- Shift down to a lower gear to maintain a smooth and responsive throttle.
- Keep your RPMs within the manufacturer’s recommended range for the break-in period.
Pro Tip: A good rule of thumb is to keep your RPMs in the mid-range, avoiding both high revs and low, bogged-down engine speeds.
3. Location Matters: Ideal Riding Conditions
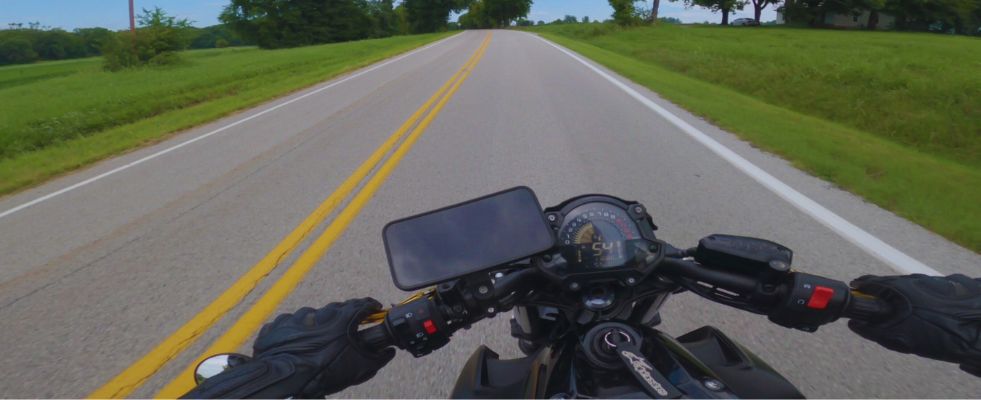
Breaking in your motorcycle in varied terrain helps to condition different components evenly.
Here’s what to aim for:
- Quiet roads with minimal traffic to allow for smooth acceleration and deceleration.
- Varied terrain (e.g., hills, curves, flat stretches) to engage different engine loads and throttle responses.
If you’re in a rural area, country roads are perfect. Urban environments require a different strategy, which we’ll cover next.
4. Tips for Urban Riders
Breaking in a motorcycle in an urban setting can be challenging due to stop-and-go traffic and lower speed limits, but it’s not impossible.
Here are some tips:
- Avoid excessive idling at traffic lights-keep your engine engaged by lightly revving or turning it off if you anticipate a long wait.
- Plan routes with varying speed limits to simulate different riding conditions.
- Use alternative times for riding, such as early mornings or late evenings, when traffic is lighter and roads are more open.
If available, seek out parking lots or industrial areas with minimal traffic to practice varying your RPMs without interruption.
Step-by-Step Break-In Procedure
Breaking in a motorcycle engine is a gradual process that requires attention to speed, RPM, and throttle control.
Below is a breakdown of what to focus on in the first critical miles and how to avoid common mistakes.
1. First 100 Miles: The Foundation Stage

Speed, RPM, and Throttle Control
In these initial miles, your focus should be on smooth, controlled riding with plenty of RPM variation.
- Speed: Keep your speed moderate, generally under 50 mph, but focus more on varying it rather than maintaining a constant pace.
- RPM Range: Stick to the lower half of the RPM range, avoiding extremes. For most bikes, this means staying below 5,000 RPM.
- Throttle: Gradual throttle inputs are key. Avoid sudden accelerations and decelerations to prevent unnecessary strain.
Avoiding High-Load Situations
- Refrain from riding two-up (with a passenger) or carrying heavy loads.
- Avoid steep hills or long periods of full-throttle acceleration.
2. Next 500 Miles: Building Confidence
Gradual Increase in Speed and Load
Once you’ve surpassed the 100-mile mark, you can start pushing the bike a little more:
- Speed: Gradually increase speeds, but remain conscious of how your engine responds.
- RPM Range: Slowly extend into higher RPM ranges but still avoid redlining. Aim for 60%-70% of the max RPM.
- Load: You can begin introducing moderate loads, such as light luggage, but continue to avoid extreme conditions.
Incorporating Deceleration Techniques

- Compression Braking: Roll off the throttle instead of using brakes exclusively. This helps seat the piston rings by applying reverse pressure on the engine.
- Throttle Variability: Alternate between light accelerations and decelerations to promote even wear across engine components.
3. Common Mistakes to Avoid
- Over-Revving the Engine
Revving your engine to the redline during the break-in period can cause damage, leading to overheating and improper wear patterns. Always keep your RPMs within the recommended range. - Skipping Early Oil Changes
Metal shavings from the initial wear process accumulate in the oil. An early oil change (often recommended at 300-600 miles) removes these contaminants and prevents long-term damage. - Neglecting Engine Noise
Pay attention to any unusual noises—clicking, knocking, or grinding sounds may indicate a problem with the break-in process. Address these immediately to avoid long-term issues.
By carefully following this step-by-step procedure, you’ll set your motorcycle up for optimal performance and reliability, ensuring a smoother, more enjoyable ride for years to come.
Post-Break-In Maintenance
Once you’ve completed the break-in period, your job isn’t done.
Proper post-break-in maintenance ensures that your engine continues to perform at its best and avoids any early wear or damage caused by the initial running period.
Oil Change & Filter Replacement

Why Timing Matters
During the break-in, tiny metal particles from the engine’s internal components are worn off and suspended in the oil.
If left unchanged, this debris can circulate through your engine, causing premature wear and reducing performance.
Changing the oil and filter soon after the break-in period—usually between 300 to 600 miles—is critical to flush out these particles and protect your engine.
Neglecting this early oil change can lead to:
- Increased friction, leading to overheating.
- Reduced lubrication, causing accelerated wear.
- Clogged oil filters, reducing oil flow to key engine components.
Once the break-in oil is replaced, switching to a higher-grade oil tailored to your riding style and environment is recommended.
Just remember to check your owner’s manual for specific oil viscosity recommendations.
And the maintenance doesn’t stop there. To know what you’re in for over the life of your motorcycle, check out our Guide on Motorcycle Maintenance.
Conclusion
Breaking in a new motorcycle might feel like a slow process, but the benefits far outweigh the effort.
By following a well-structured break-in procedure and staying on top of early maintenance, you’re investing in your bike’s long-term performance, reliability, and safety.
From proper piston ring seating to post-break-in oil changes, every step you take during this critical period will pay off with smoother rides, fewer repairs, and a more enjoyable riding experience for years to come.
So, take it easy during those first few hundred miles, stay vigilant with your maintenance, and enjoy the journey of bonding with your new motorcycle.
