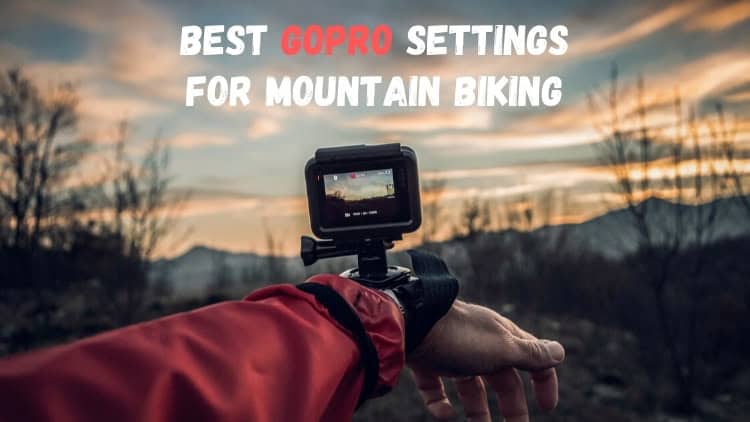
So you’re all set with a new GoPro, the Chest Mount and enough excitement to fill 2 SD cards worth of awesome Mountain Bike footage.
But your videos aren’t coming out the best when you finally get home to edit.
If you’re wondering why your videos don’t look like the ones you watch on YouTube, there’s a good chance you need to adjust the settings on your GoPro.
But don’t worry, I’ve been looking into this ever since I got my first GoPro, and here is the consensus from the experts.
For Out-of-the-Box Ready
For Post-Production Coloring
- Resolution – 4k
- FPS – 30fps*
- Field of View – Wide*
- Hyper smooth – On
- Low Light – Off
- Zoom – 1.0x
- Spot Meter – Off
- ProTune – On
- Bit Rate – Low*
- Shutter – Auto
- EV Comp – 0*
- White Balance – Auto
- Color – GoPro
- ISO Limit – 100/1600
- Sharpness – Low
- Resolution – 4k 4:3
- FPS – 30/24*
- Field of View – Superwide*
- Hyper smooth – On
- Low Light – Off
- Zoom – 1.0x
- Spot Meter – Off
- ProTune – On
- Bit Rate – Low*
- Shutter – Auto
- EV Comp: -1.0*
- White Balance – 5500k to 6500k*
- Color – Flat
- ISO Limit – 100/400*
- Sharpness – Low
Just as important as the best places to mount your GoPro, having your GoPro dialed for the right settings can really make or break your whole edit.
While I would love to just provide the settings above and send you on your way to epic footage, to really make the best video you can, you have to understand each setting to some degree.
Now I’m not asking you to become a professional videographer/editor, but if you’re willing to drop $400 on an action camera, it is worth the extra investment in yourself.
Especially if these investments make you happier with your MTB videos.
If this sounds a little too involving, don’t worry, I added the extra settings above to get you started with little to no changes.
And don’t feel too bad, I’m far from professional when it comes to these things. I can relate though, as I was once in the same position, hoping to learn.
If you’re interested in taking your MTB footage to the next level, keep reading so you can learn how to make great Mountain Bike videos.
Resolution and Frame Rate
One of the first choices you must make when you start filming with your GoPro is the Resolution and Frame Rate.
These terms should be relatively familiar to you. This is what people are referring to when they mention 4K or 24 FPS(frames-per-second), etc.
To better explain, I will give you a simple understanding of how Video works.
When you think you’re watching a movie or YouTube video, you’re actually watching a series of images. The images are played in intervals at a smooth speed, making them appear like one fluid viewing – Viola, video!
The Frame Rate refers to the number of images played within a certain interval, in this case, how many Frames are displayed in a matter of 1 second. As a standard, most video we see today is shot at around 24 to 30 frames per second, or fps. Which works fine, as it provides a fairly “Cinematic” look to the footage. Upping the Frames-per-second towards 60 fps, which the latest GoPro’s are certainly capable of, the video then starts to get smoother.
Breaking it down a little further, each image in a video is made up of tiny colored squares called “Pixels”.
If you zoom in far enough on most videos, you are actually able to see the tiny pixels that make up the video you’re watching.
This is where the Resolution comes in. Resolution refers to the number of Pixels that make up an image. The more pixels per image, the sharper that image will appear.
So if you have a high resolution – making smoother images, and a high frame rate – providing a smoother viewing, won’t that make for the best video?
Surprisingly, the answer is not always yes, especially when you’re filming a sport like Mountain Biking.
High frame rates have the unfortunate symptom of slowing down footage, which can make it look like you’re riding a lot slower than you actually are.
Although 24 or 30 fps seems low, especially with a GoPro capable of 4K at 60fps, that 24 fps gives you that sense of speed that we are accustomed to with MTB videos.
But 60 fps can be really beneficial when you need it. Most of the time, that is when you are wanting to either slow down the video or grab a picture from one of the frames.
In fact, if you plan on doing a few slo-mo’s or grabbing a snapshot from a video during your rides, you may be better off just filming in 60 fps. Just make sure to compensate for the larger file size until you can down sub later on in the edit.
Field of View
The next step in setting up your GoPro is to choose the Field of View.
GoPro’s are known for their wide depth of view, so expect the lenses to cater to wider shots.
Field of View, or “Lenses” as GoPro refers to them, dictates how wide your shot will be when you film.
Now this one is also really important, but there is a little leeway as to how you can go about setting it up.
I would say that most Mountain Bikers prefer the “Superwide” lens that GoPro offers, with the other majority sticking to the standard “Wide” view.
Regardless, Mountain Bikers can all agree that a wide angle is the best way to go about filming an MTB video.
While the linear and standard views offer superior stability, the wide angles are the best when you’re trying to capture speed.
Take a look at the two videos below, can you see the difference between the Linear and Wide modes on the GoPro?
While the videos both look great, the one on the left definitely communicates the rider’s speed a lot better.
The only caveat to using wide-angle lenses, is that they can cause a certain amount of distortion in the frame, what some people call the “fisheye effect”.
GoPro’s Superwide setting causes the most distortion, especially along the sides, but it also allows you to capture the most image data possible if you plan on editing later.
Using the wide angle also works well to convey speed, it’s just a little more cropped in, so you may have to focus more on capturing everything in the frame.
Just make sure to experiment with this setting and adjust to your own preferences.
EV Comp
One of the most important settings for any camera, even more so for GoPro’s, are the settings affected by light.
EV Comp, also known as Exposure Value Compensation, is a setting you use to lower or increase the brightness of your video.
By default, GoPro have the EV Comp set to Auto – which does a well enough job in most instances, but as Mountain Bikers, we encounter many scenes that push the GoPro’s auto settings to their limit.
A case and point is when you’re riding through heavy trees on a really sunny day.
The Automatic EV Comp setting does a good job of brightening up the video when you’re riding under shade, but as soon as you reach one of those bright patches of trail, the GoPro can’t adjust quickly enough.
The whole ordeal makes for a really inconsistent video quality when it comes to lighting, as there is a significant loss of detail in these situations.
Check out the 3 images below and the difference between them:
As a general rule of thumb, most Mountain Bikers would recommend that you “under-expose” your videos by setting a negative EV Comp Value.
This allows you to capture more detail in bright lighting, making it easier to color grade later in the post.
If you don’t feel confident with adjusting this setting, you can always leave it at 0.
White Balance
If you’ve only ever messed with a smartphone camera, this next one may be a completely new topic for you.
One of the most important settings you have to adjust when you’re Mountain Biking is the White Balance of your GoPro.
And pay close attention, because this one can be tricky.
Starting off, what is White Balance?
I found that Camera Jabber has one of the best descriptions of White Balance when it says, “White balance is a camera control that adjusts the camera’s color sensitivity to match the prevailing color of light. This can be outdoor light (which is ‘cooler’ and blue), indoor light (which is usually ‘warmer’ and red), or fluorescent light (which tends to be more green).”
To put it more simply, White Balance is the balance of color in a video, specifically the color White.
All in an effort to match the Color Temperature based on the current lighting. Warming cooler tones and cooling warmer tones to provide the most natural video.
White Balance is measured in Kelvin on a temperature chart from 1500 to 8000 degrees Kelvin. 8000k is the “coolest” temperature, getting warmer as you get close to 1500k.
GoPro has a pretty good Auto setting for the White Balance, but this can get tricky for Mountain Bikers, as we often ride through high-contrast areas.
The GoPro especially struggles with those settings where you’re riding through heavy forest on a sunny day. The White Balance auto-adjusts to brighten the video in the shade, but the highlights get blown out as soon as you hit those bright patches that sneak through the foliage.
All in all, the Auto-setting is not a deal breaker. Setting your White Balance manually just helps provide a more consistent video throughout. This also makes it loads easier to edit later on.
For a quick reference, check out the pictures below and the suggestions for the White Balance in each setting.
Just like any setting on this list, you will have to learn by trial and error, but the lessons learned will be invaluable later on when you get serious about your MTB videos.
Color!
If you’ve ever watched an MTB video of North Shore or Utah, you’ve probably been quite impressed with the quality of the GoPro video, specifically when it comes to Color.
But believe it or not, it takes a lot more than you think to get that good Color quality out of your footage.
While the standard GoPro color setting works fine in most instances, it’s not always the best option for us Mountain Bikers.
When most people talk about the default GoPro color setting, you will often hear them use the word “punchy”.
This is because the GoPro color uses high contrast to make the scene pop out.
This looks great most of the time but fails when the scene is already a high-contrast environment.
What you will find, is that most Mountain Bikers will set their GoPro to the “Flat” color profile and edit later on in the post.
Now I know this sounds a little counterintuitive, as the “Flat” GoPro setting can leave your initial video looking flat and dull.
But if you plan on color grading later in editing, using a flat color profile gives you a better dynamic range to work with.
The Loam Ranger has one of the best videos on this issue, along with an explanation of how to add the best color profile to your videos, check it out below:
In short, if you’re wanting a video that looks good out of the box, you can leave the default GoPro coloring on. If you plan on color grading the footage later in the post, using the Flat setting will allow you to fine-tune the coloring for the best video possible.
ISO Limit
Following up on how important lighting is in your photos and videos if you want to get the best footage out of your GoPro, make sure you don’t mess up this setting.
The final light setting I really recommend you change is your ISO settings.
Now I know I already mentioned EV Comp, but ISO takes the lighting to another level.
Essentially, ISO is how sensitive your GoPro’s sensor will be to light.
ISO is measured just like most other settings, with a usually minimum of 100 and a maximum of 6400. And yes, you will need to set both.
Adjusting your minimum ISO is really easy, as it almost always stays at 100. Setting your Max ISO on the other hand can be really tricky.
The overall goal is to set the max ISO to the lowest setting possible while keeping the best image quality.
The higher Max ISO settings are specifically made for night and extremely low light situations, where you have a limited light source.
For a good video comparison of different ISO settings, check out Mic Bergsma’s Video below:
Based on some of my favorite Youtubers, the best ISO settings are between 100/400 and 100/800.
Sharpness
Now that we mentioned how counterintuitive color grading can be, I have to mention the next setting that can mix you up if you’re not careful.
When I first started filming with my GoPro, I used to max out all the settings, including my Sharpness.
I would later wonder why my videos continued to look grainy, even after playing with just about every setting.
After seeing The Loam Ranger’s video about MTB GoPro settings, I realized that I was making a huge mistake by using High Sharpness in my videos.
As it turns out, Sharpness is just the camera’s attempt to digitally sharpen a video. As you can imagine, this does not actually sharpen the image that well, and can even cause worse video quality, especially in low-light conditions.
Being capable of 4k at 60fps, GoPro’s have ample power to capture a really crisp video.
And with some post-process sharpening, you can really get the most out of them.
But you don’t get too carried away, you also don’t want to “over-sharpen” your MTB videos.
As I mentioned in the FOV and Resolution sections, that sense of speed is so important to an MTB video. This is why you use a lower frame rate and wider field of view.
This same aspect applies to the sharpness.
Unless you need to slow down a section of footage, you want to avoid over-sharpening your videos.
Conclusion
In conclusion, I really hope this guide helps get you started messing with your own settings.
Use them as a starting off point or completely customize them based on your own preferences, either way, continue to learn and grow your knowledge of how each setting works together to make the best MTB video.
For some further info on the best GoPro settings for Mountain Biking, check out some of these videos from the best in the game.
https://www.youtube.com/watch?v=TQByPiraGr0https://www.youtube.com/watch?v=-BGcP2PdjLs
Additional Resources:
Abe Kislevitz – https://abekislevitz.com/my-hero8-black-preset-settings/
ProjectGo – https://projectgo.pro/gopro-protune/
The Loam Ranger – https://www.youtube.com/watch?v=2YEePcJZcFI and https://www.youtube.com/watch?v=NXnBCkF9jUQ
Congratulations on your new GoPro and good luck with your awesome videos!