Want to improve your confidence and peace of mind on your motorcycle?
Do a pre-ride inspection before every ride.
It doesn’t take that long and it can literally save your life.
This is especially important for new riders who are just learning how to ride a motorcycle.
You may not know if something feels off while riding, and any issues can be disastrous once the motorcycle starts moving.
A pre-ride safety check should be mandatory before every ride and after you do it 2-3 times, it will become second nature.
And don’t worry, this is not some 30-minute drill you have to do before every ride.
At most, it should take you less than 2 minutes and you can easily knock it out while your motorcycle is still warming up:
- Check for any leaks or loose parts – 10 seconds
- Check Tire PSI and Tread – 20 – 60 seconds
- Check your chain for oil, kinks, and rust – 10 seconds
- Check your fluid levels and color (brake fluid, oil, coolant) – 10 seconds
- Check Suspension for Leaks and Rebound – 10 seconds
- Check Brakes* – 20 seconds
I can promise you, a pre-ride check is a huge confidence boost for new riders.
And if you are looking for more, check out our Guide on How to Build Confidence as a New Rider.
Quick Pre-Ride Safety Check – Before Every Ride
Let’s be realistic, if you ask everyone to spend 10 minutes going through all the steps in the TCLOCS checklist, 90% of riders would skip the pre-ride check altogether.

Instead, I find myself running through the essentials on every ride and saving some of the others for my weekly safety checks.
Here are the essentials that I check before every ride:
1. Check for Leaks or Loose Parts – 10 seconds
The first check is also the easiest and should take a couple of seconds max.
All you need to do is walk around the motorcycle and check for any leaks or loose parts.
- Check for any oil or fluid leaks under the motorcycle
- Check for any loose parts or bolts
If there’s oil, brake fluid, coolant, or gas puddles forming underneath your bike, it’s a good thing you caught it before the ride
Why this is essential: Low oil or fluid could be disastrous to your motorcycle and your safety. Spotting leaks or loose parts before your ride can save you in more ways than one.
2. Check Tire Pressure and Wear – 20-60 seconds
Tires are the first thing that comes to mind when I do my pre-ride safety check because they have such a huge effect on your handling.
Your tires are the only thing connecting you to the ground and when they are worn, under-inflated or over-inflated, the motorcycle will not handle correctly.
- Check Tire Pressure
- Check Tread Life and Wear
Checking Tire Pressure – Make sure your tires are inflated to the manufacturer-recommended PSI, which is usually found on the swingarm or in the manual.
Checking Tread and Wear – You should also make sure you have enough tread and even wear. Low or no tread could be disastrous and uneven wear could point to a bigger issue.
Why this is essential: Low PSI can make the motorcycle feel sluggish and harder to manage, which can cause wrecks at speed or in turns. Over-inflated tires have less grip and can cause slips and low sides. No or uneven tread can make the motorcycle unpredictable to handle, which can cause a crash. Uneven wear can even point to bigger issues with the tires or motorcycle.
3. Check Chain/Belt Condition – 10 seconds

While you’re checking your tires, take a quick glance at your chain or drive belt.
Although it only takes a few seconds, you’re checking for a few things:
- Excess Slack
- Master-link condition
- Fraying Belt or Kinked Links
- Rust and Debris
- Lack of Oil/Lubricant
I’ve seen enough videos of riders losing their chain at speed to know not to play around with chain maintenance.
Always make sure your chain has the proper tension, lubrication, and condition.
Why this is essential: Not only will a worn or loose chain affect performance, but it can also break or fail and cause a lot of damage. Making sure it has proper tension and lubrication will keep you safe for years to come.
4. Check Oil and Fluid Levels – 10 seconds
For most modern motorcycles, checking fluids should take a few seconds.
Most motorcycles have sight glasses or transparent reservoirs so you can check fluid levels and coloration.
I usually take a look at my brake fluid and coolant before getting on the bike and then I check my oil once I hop on and can stand the bike upright.
After locating the reservoir and sight glass for your motorcycle, try to check the fluid levels and coloration before every ride.
- Check Oil level and color
- Check Brake fluid level and color
- Check coolant levels
Why this is essential: Low oil or coolant can be dangerous for your motorcycle and low or bad brake fluid could cause your brakes to fail. All around, it’s just not good.
5. Check Suspension – 10 seconds
Similar to your tires, your motorcycle’s suspension plays a huge role in how well your motorcycle handles.
You can easily check this by taking a peek at the front forks before getting on the bike and then checking the rebound once you’re sitting on the bike.

- Check fork seals for any leaking oil
- Check for a smooth rebound once you’re sitting on the bike.
Checking your front forks – Check your front forks for any signs of leaking oil or scratching. This could point to a bad seal or worse. Either way, this could spell trouble.
Check for good, smooth rebound – Once you’re sitting on the bike, hold the front brake and push the front wheel into the ground. As the front suspension rebounds back up, make sure it is a smooth and controlled motion. If there are any “kinks” or excessive bouncing, the motorcycle will be prone to losing control during turns or hard acceleration.
Why this is essential: Suspension has a huge effect on a motorcycle’s handling. If there are any issues with the suspension, the motorcycle may be hard to control or the cause of a crash.
6. Check Brakes – 20 seconds
Other than when I initially check for loose parts, I actually check my brakes once I finish all the other steps and start to ride away.
Once the motorcycle is moving, but before I get out on the road, I will slow the bike down to a full stop using both brakes. Then I start moving again and only use the front brake, then I start again and only use the back brake. I initially started doing this after my bike sat for a month and I needed to knock the rust off, but it has quickly become a good routine for checking the brakes and making sure I have a good feel for both.
- Test the function of both brakes before getting up to speed, whether in your driveway, apartment complex, or local road.
Why this is essential: Your brakes are how you stop the motorcycle, if they fail or don’t function correctly, you are no longer in control of the motorcycle.
Honestly, if you stay on top of these checks, it will be that much easier the next time you need to do a little motorcycle maintenance.
Recommended Tools and Tips for Pre-Ride Safety Check

This pre-ride safety check is quick and easy but you will need to arm yourself with a few tools and tips.
Recommended Tools
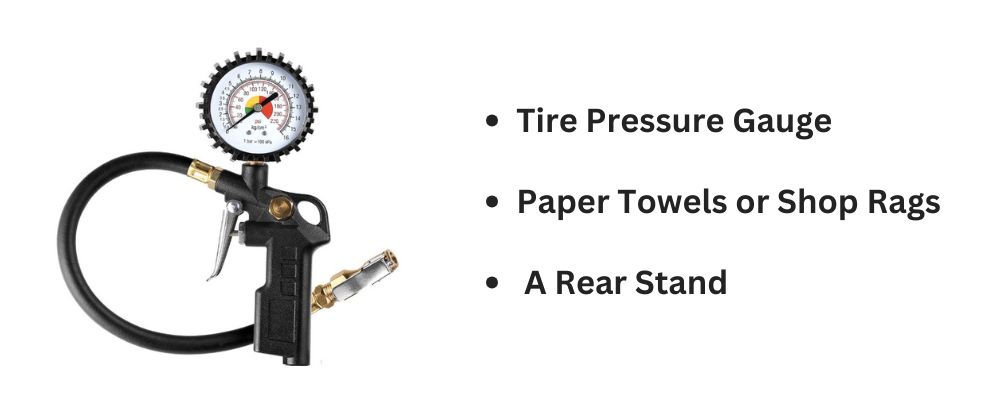
1. Tire Pressure Gauge/Inflator – For checking and potentially adding air to your tires
The easier it is to check your tire pressure, the more often you will do it.
I managed with one of those cheap pencil-style gauges and a plug-in air pump for a few months. Which was a pain because I had to pull my car around to plug in the air pump and it was a lot more headache than it needed to be.
I finally saved up enough for one of those portable air pumps and have never looked back.
You can get them for pretty cheap on Amazon, just make sure you read reviews and have a pencil-style gauge on hand to double-check PSI readings.
2. Paper Towels or Shop Rags – For cleaning and checking fluids
Paper towels are essential for every tool kit, and they are multi-purpose when it comes to pre-ride checks.
Use them to clean your mirrors or any dirt, or use them to check and identify leaks.
I can’t explain it, but anytime I grab paper towels and head to my bike, I find some sort of use for them.
3. A Rear Stand for Your Motorcycle
A rear stand is well worth the $100.
As soon as you need to clean and lube your chain, you will be wishing you had one.
It also comes in handy when you’re cleaning your bike.
Of course, you can get away without it for a while but it will be at the top of your list after the first chain maintenance session.
Additional Tips

- Always check tire pressure and condition before every ride.
- Always check your brakes before getting up to speed
- Always check the condition of the chain
I don’t care how much of a rush you are in, you can never afford to skip out on these checks.
I have seen and witnessed wrecks from all 3 of these factors and they have become a permanent ritual before every ride.
And other than checking your tire pressure, they all take no time at all.
Finally, this is a great way to stay ahead of your motorcycle maintenance.
You will catch any potential issues before they become serious.
Conclusion
As I mentioned before, the pre-ride check can take you less than 2 minutes and can literally save your life.
For a quick reference, download our Pre-ride Checklist for your next ride.
Stay safe and have fun!

